BusStop - Docs
This page contains all the key documents you might need. Feel free to browse, download, and stay updated with the latest versions. We regularly update this section to ensure you have the most current and relevant documents at your fingertips.
How to setup an account with BusStop?
BusStop is a no-code API testing platform built to simplify your testing journey. The setup process is fast, secure, and beginner-friendly. Follow the steps below to get started.
Step 1: Login to BusStop
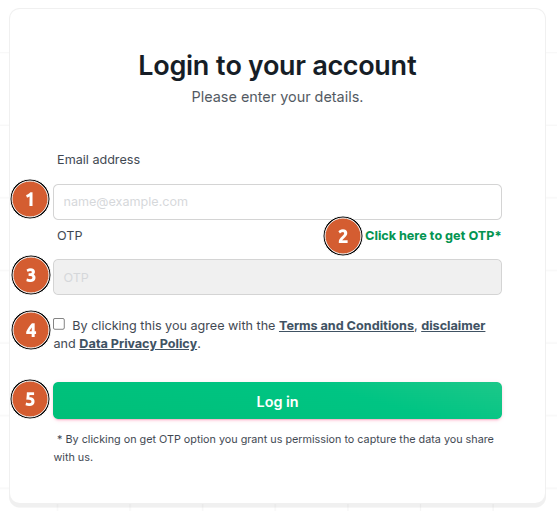
To begin, go to the official BusStop website. You will see a login form on the screen.
Enter your email ID in the input field and click on the Get OTP button.
Check your email inbox for the received OTP. Enter that OTP into the textbox on the screen.
You must also accept the terms and conditions to proceed. Reading them is always recommended.
Once done, click on the Login button to continue.
Step 2: Initialize Your First Project
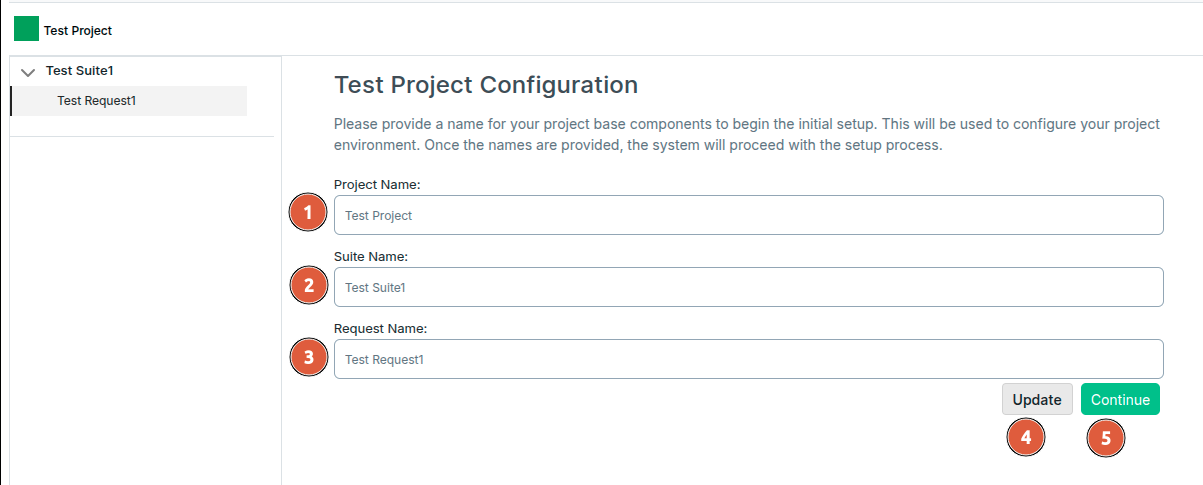
Once logged in, BusStop creates a one-time default project. This helps you start faster.
The screen will show default values for the project name, suite name, and request name.
You can edit these names if required. If not, click on the Continue button to proceed.
Step 3: Land on the Request Page
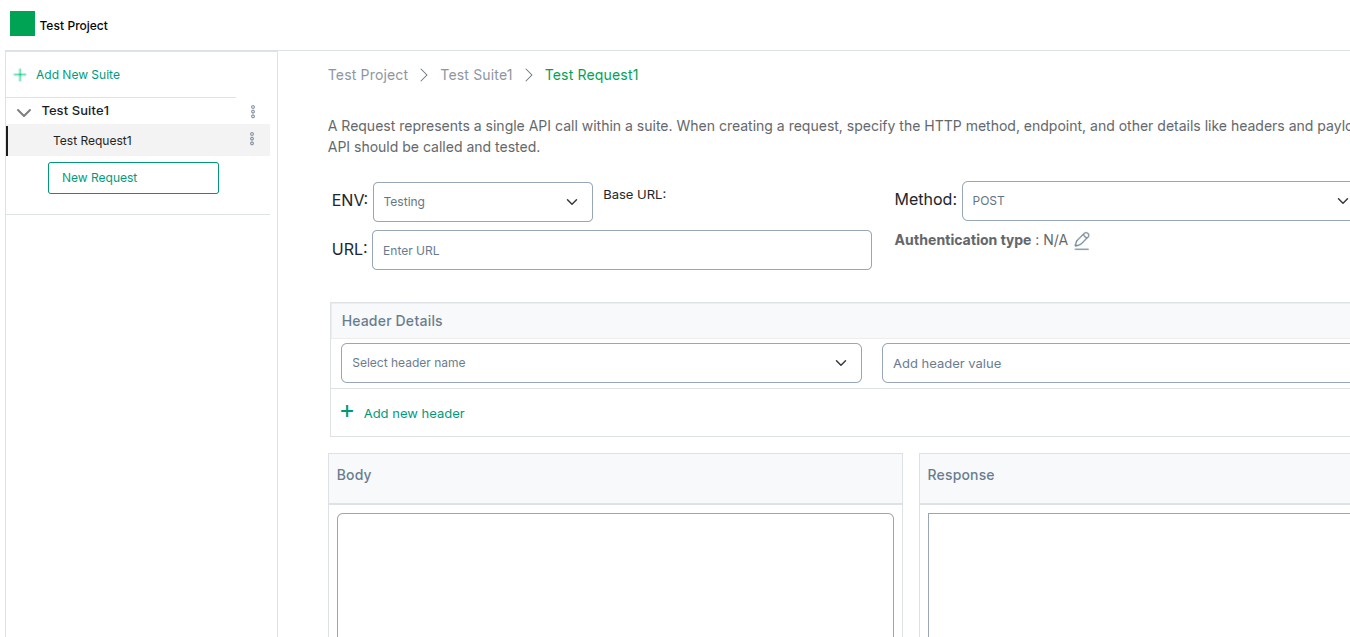
After confirming your project setup, the system takes you to the Request Page.
This is where you can view and manage your API test cases. The interface is clean and intuitive.
Step 4: Add Requests and Manage the Project
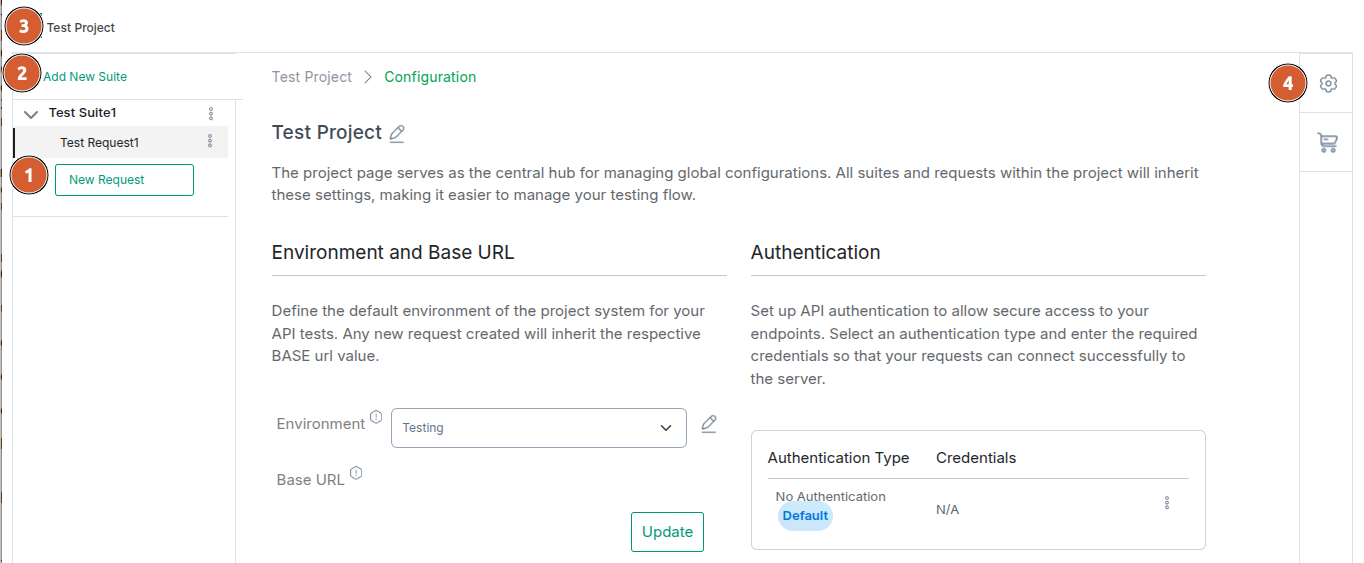
Click the New Request button on the right-side menu to add a request to your suite.
To organize your test cases better, click the New Suite button to add a suite.
If you click on the Project Name at the top, you will see the project-level settings.
To modify configurations like environment variables, click the Gear Icon in the side menu.
 How to configure API using BusStop?
 How to setup an account with BusStop?
Like what you read?
Be updated with feature updates, promotional offers, latest content and more from BusStop - API Automation testing tool.