BusStop - Docs
This page contains all the key documents you might need. Feel free to browse, download, and stay updated with the latest versions. We regularly update this section to ensure you have the most current and relevant documents at your fingertips.
How to configure API using BusStop?
The BusStop API Configuration Form allows users to easily set up API calls by entering various parameters directly into a user-friendly form. Once all required fields are filled out, the user can submit the form to execute the API request and view the response.
Form Overview
The BusStop API Configuration form allows users to configure API calls by entering various parameters in a form and submitting them
The form display is as below
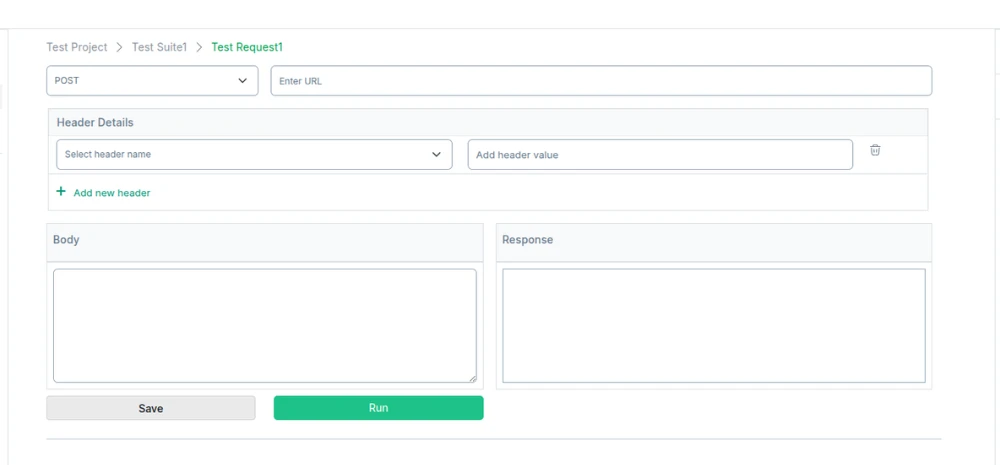
The configuration form includes several key fields to define the API request:
- API Method: A dropdown that lets users choose the HTTP method for the API call (e.g., GET, POST, PUT, DELETE).
- API URL: A text input where users specify the full URL of the API endpoint, including any path parameters.
- Request Headers: A key-value pair interface allowing users to configure the headers necessary for the API request.
- Request Body: A text area where users can input a JSON body for requests like POST or PUT.
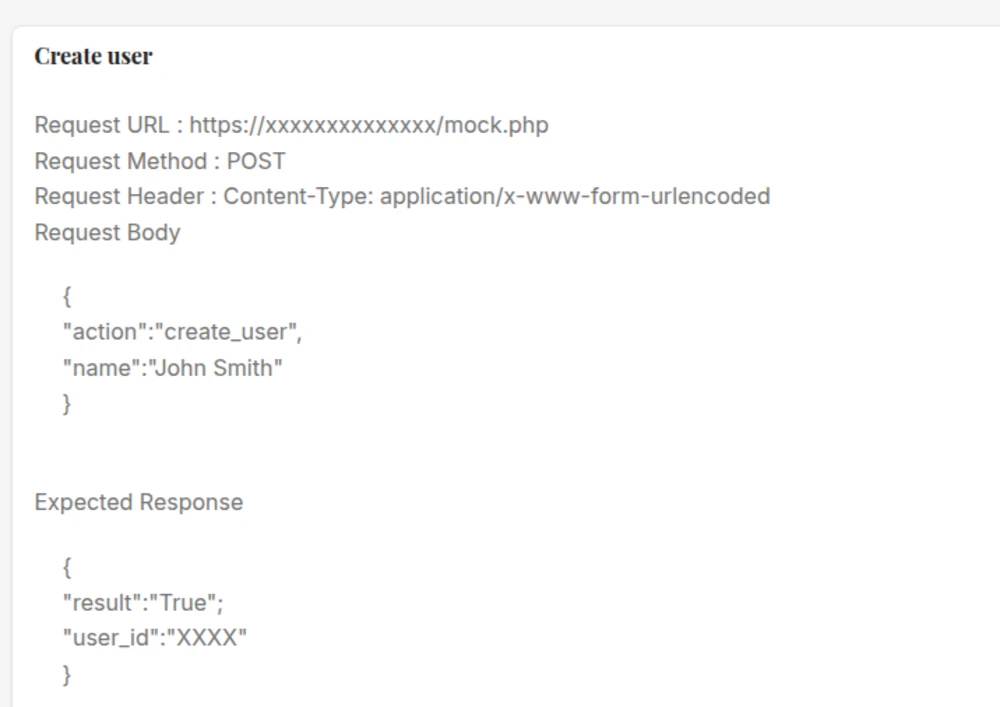
Example: Creating a New User API
To demonstrate how the configuration works, let’s walk through an example API document for creating a new user. Follow the steps below to set up and run the request.
.
Step-by-Step Guide
.
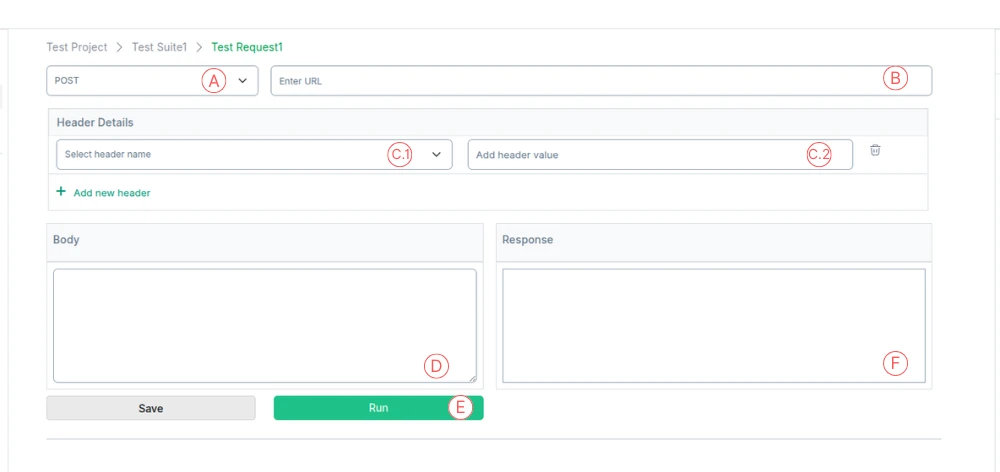
Select API Method (POST) - From the dropdown menu, choose POST (A in the figure). This method will allow us to send data to the server to create a new user.
Enter API URL: In the API URL text field, enter: https://test.busstopsolutions.com/controllers/mock.php (B in the figure). This is the URL endpoint for the user creation process.
Configure Request Header : For the header configuration, follow these steps:
- From the Header dropdown, select content-type (C.1 in the figure).
- In the value field, enter: application/x-www-form-urlencoded (C.2 in the figure). This specifies the format of the request body.
In the value field, enter: application/x-www-form-urlencoded (C.2 in the figure). This specifies the format of the request body.
- { "action": "create_user", "name": "John Smith" }
This will instruct the API to create a user named "John Smith" (D in the figure).
Submit the Request: Once all the fields are filled, click the ‘Run’ button (E in the figure) to send the API request.
Response Handling
After submitting the request, the system will perform validation checks on the form data, ensuring all required fields are correctly filled. Once validated, the API request will be processed, and the system will display the response in the Response Section (F in the figure).